As someone who has always been fascinated by the art of breadmaking, I have recently become enamored with the world of sourdough. The process of creating a tangy, chewy loaf from just flour, water, and wild yeast feels like a magical journey. But where does one begin? How does one nurture a living starter, mix and ferment the dough, and create that perfect crust and crumb? In this beginner’s guide to sourdough bread, I will walk you through each step, equipping you with the knowledge and confidence to embark on your own sourdough adventure. So, let’s dive in and uncover the secrets of this ancient and delicious craft.
Understanding Sourdough Starter
To understand sourdough starter, it is essential to grasp the fundamental role it plays in the fermentation process of making sourdough bread. Sourdough starter is a combination of flour and water that captures wild yeast and beneficial bacteria from the environment. These microorganisms feed on the carbohydrates in the flour and produce carbon dioxide gas, which causes the dough to rise.
There are different types of sourdough starters, each with its own unique characteristics. The most common types are the wheat-based starter and the rye-based starter. The wheat-based starter is milder in flavor and easier to work with, making it a popular choice for beginners. On the other hand, the rye-based starter has a stronger flavor profile and is more resilient, making it a favorite among experienced bakers.
Troubleshooting sourdough starter can be a challenge, but with some knowledge and patience, it can be resolved. Common issues include a sluggish or inactive starter, a strong acetone smell, or mold growth. These issues can often be resolved by adjusting the feeding schedule, adjusting the temperature, or discarding and starting over if necessary.
Feeding and Maintaining Your Starter
Now that you understand the role of sourdough starter in the fermentation process, let’s move on to feeding and maintaining your starter. Proper care of your starter is crucial to ensure a healthy and active culture for your sourdough bread. Here are three essential steps for starter care:
-
Feeding Schedule: Feed your starter regularly to keep it active and maintain its balance of yeast and bacteria. A general rule of thumb is to feed it once every 24 hours, but you can adjust this based on the temperature and activity of your starter. For colder environments, you may need to feed it every 12 hours to keep it thriving.
-
Feeding Ratio: Maintain a consistent feeding ratio to promote a stable and robust culture. A common ratio is equal parts of flour and water, such as 1:1:1 (starter:flour:water) or 1:2:2, depending on your preferences. Use a kitchen scale to ensure accuracy in measurements.
-
Troubleshooting Common Issues: Pay attention to signs of trouble, such as a sluggish or overly sour starter. If your starter smells foul or shows signs of mold, discard it and start fresh. Adjusting the feeding ratio, temperature, or hydration level can often solve common issues.
Mixing and Fermenting the Dough
I recommend thoroughly mixing the ingredients to ensure a well-incorporated dough that will ferment properly. Proper mixing is crucial in developing gluten, which gives the bread its structure and texture. There are different kneading techniques you can use to achieve the desired results. One common technique is the stretch and fold method, where you stretch the dough and fold it onto itself multiple times during the fermentation process. This helps to develop the gluten while also redistributing the yeast and bacteria. Alternatively, you can also use a stand mixer with a dough hook attachment for convenience.
To troubleshoot fermentation, it’s important to understand the signs of a healthy fermentation process. During fermentation, the dough should increase in volume and develop small air bubbles. If you notice that your dough is not rising or is not as active as expected, there are a few possible issues to consider. One common problem is under-fermentation, which can be resolved by allowing the dough to ferment for a longer period of time. On the other hand, over-fermentation can lead to a dough that is overly acidic or has a strong alcohol smell. In this case, you can try shortening the fermentation time or adjusting the temperature of your dough.
Here’s a helpful table to summarize the kneading techniques and troubleshooting tips for fermentation:
| Kneading Techniques | Troubleshooting Fermentation |
|---|---|
| Stretch and fold | Under-fermentation |
| Stand mixer with dough | Over-fermentation |
| hook attachment |
Shaping and Proofing Your Loaf
For a perfectly shaped and well-risen loaf, follow these steps for shaping and proofing your dough.
- Shaping Techniques:
- Gently flatten the dough into a rectangle.
- Fold the two sides of the rectangle towards the center.
- Starting from the bottom, roll the dough into a tight log.
- Troubleshooting Proofing:
- If your dough doesn’t rise enough during proofing, check the temperature. It should be around 75-80°F (24-27°C) for optimal fermentation.
- Make sure you give your dough enough time to proof. Depending on the recipe, this can range from 2 to 4 hours.
- Avoid overproofing, as it can result in a flat, dense loaf. The dough should have doubled in size and hold an indentation when gently pressed.
- Shape and Proof in a Banneton:
- Dust a banneton (proofing basket) with flour or line it with a cloth.
- Place the shaped dough seam-side up in the banneton.
- Cover the dough with a clean kitchen towel and let it proof for the recommended time.
Baking and Enjoying Your Sourdough Bread
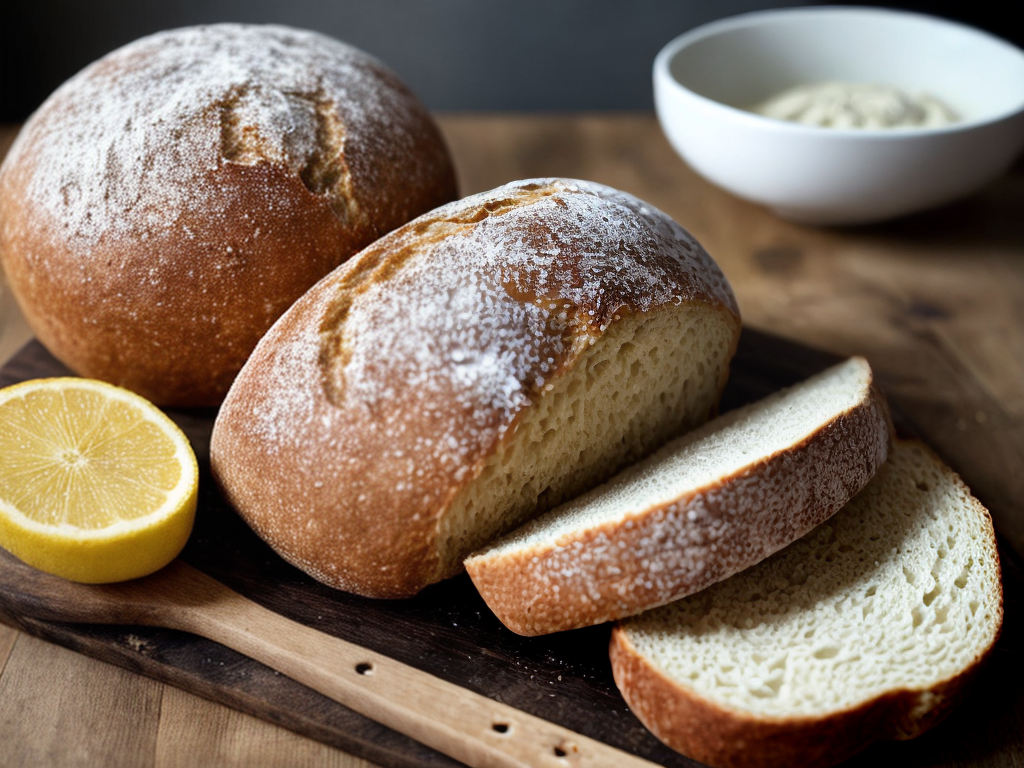
To achieve a perfect crust and a flavorful interior, follow these steps for baking and savoring your homemade sourdough bread. Baking techniques play a crucial role in creating that desirable texture and taste. Preheat your oven to 450°F (230°C) and place a Dutch oven or a baking stone inside to heat up. Once your dough has completed its final proofing, carefully transfer it onto a piece of parchment paper. Use a sharp knife or lame to score the dough, allowing it to expand during baking. Gently place the dough, along with the parchment paper, into the preheated Dutch oven or onto the hot baking stone. Cover the Dutch oven with its lid or use a large metal bowl to create steam around the baking stone. This steam helps develop a beautiful crust. Bake for 20 minutes with the lid on, then remove the lid and continue baking for another 20 minutes or until the bread is golden brown. Allow the bread to cool completely before slicing to ensure the best flavor and texture.
Sourdough bread variations can add excitement to your baking journey. Try incorporating different ingredients like herbs, cheese, or even dried fruits and nuts into your dough during the mixing process. This will add extra flavor and texture to your bread. You can also experiment with different shapes and sizes, such as baguettes, rolls, or boules, to create an assortment of sourdough bread options. Remember to adjust the baking time accordingly based on the size and shape of your bread. Enjoy the satisfaction of baking your own sourdough bread and savor the results of your hard work. Happy baking!
Conclusion
In conclusion, mastering the art of sourdough bread making requires understanding the sourdough starter, diligently feeding and maintaining it, expertly mixing and fermenting the dough, skillfully shaping and proofing the loaf, and finally, baking and savoring the delicious results. With practice and patience, anyone can become a confident sourdough baker, creating their own flavorful loaves to enjoy and share. So why wait? Get started on your sourdough journey today and elevate your bread-making skills to new heights.


