The Quest for Flaky Perfection
As a self-proclaimed pie aficionado, I’ve had my fair share of encounters with homemade pie crusts. From the disastrous rock-hard disasters to the elusive flaky wonders, I’ve seen it all. But today, I’m excited to share the secrets to achieving pie crust perfection – the kind that will have your family and friends raving about your baking prowess.
You see, making a great pie crust is like a delicate dance. It requires just the right balance of ingredients, chilling time, and a gentle touch. But don’t worry, I’m here to guide you through every step, so you can become a pie crust master in no time.
The Essentials: Butter, Flour, and a Little Bit of Magic
Let’s start with the basics. The foundation of any fantastic pie crust is a combination of butter and all-purpose flour. Now, I know what you’re thinking – “But Shawn, doesn’t everyone use that?” Well, hold onto your rolling pin, because I’ve got a secret ingredient that’s going to take your crust to the next level.
Vinegar. Yep, that’s right, a tablespoon of good old white vinegar is the key to achieving that heavenly, melt-in-your-mouth texture. Trust me, it might sound unconventional, but it’s a game-changer. The vinegar helps to tenderize the dough, creating a crust that’s both sturdy and delicate.
But the real secret weapon? Keeping everything ice cold. From the butter to the water, maintaining that chill is crucial. Why, you ask? Well, when the cold fat hits the hot oven, it creates steam and pockets of air, resulting in that signature flakiness we all crave.
The Chilling Process: A Lesson in Patience
Now, I know what you’re thinking – “But Shawn, I want to bake my pie right now!” I hear you, but trust me, the extra effort of chilling the dough is so worth it. Think of it as a little pre-baking meditation session.
After mixing the dough, you’ll want to divide it into two equal discs and pop them in the fridge for at least two hours, or up to 24 hours. This resting period allows the gluten to relax, making the dough much easier to roll out without any stubborn shrinkage.
But wait, there’s more! If you’re the planning-ahead type (or just really love homemade pie), you can even freeze the dough for up to three months. Just make sure to thaw it overnight in the fridge before rolling it out. This way, you’ll always have a ready-to-go pie crust waiting in the wings, ready to transform your favorite fillings into a masterpiece.
The Rolling Technique: Gentle Is the Name of the Game
Alright, the dough is chilled, and you’re ready to roll. But before you start manhandling that precious dough, let me share a few tips to keep it happy and cooperative.
First and foremost, work on a lightly floured surface. You want just enough flour to prevent sticking, but not so much that it dries out the dough. And speaking of drying out, be sure to keep those discs covered with plastic wrap while you’re working. We don’t want any unwanted cracks or tears.
When it comes to the actual rolling, it’s all about a gentle, steady touch. Start in the center and work your way outward, using even, light strokes. Resist the urge to go back and forth – that’s a surefire way to end up with a tough, unforgiving crust.
And don’t be afraid to flip the dough if the bottom starts sticking. Just make sure to re-flour the surface before you do. The goal is to keep that dough moving smoothly, without any unnecessary stress.
The Finishing Touches: Crimping and Blind Baking
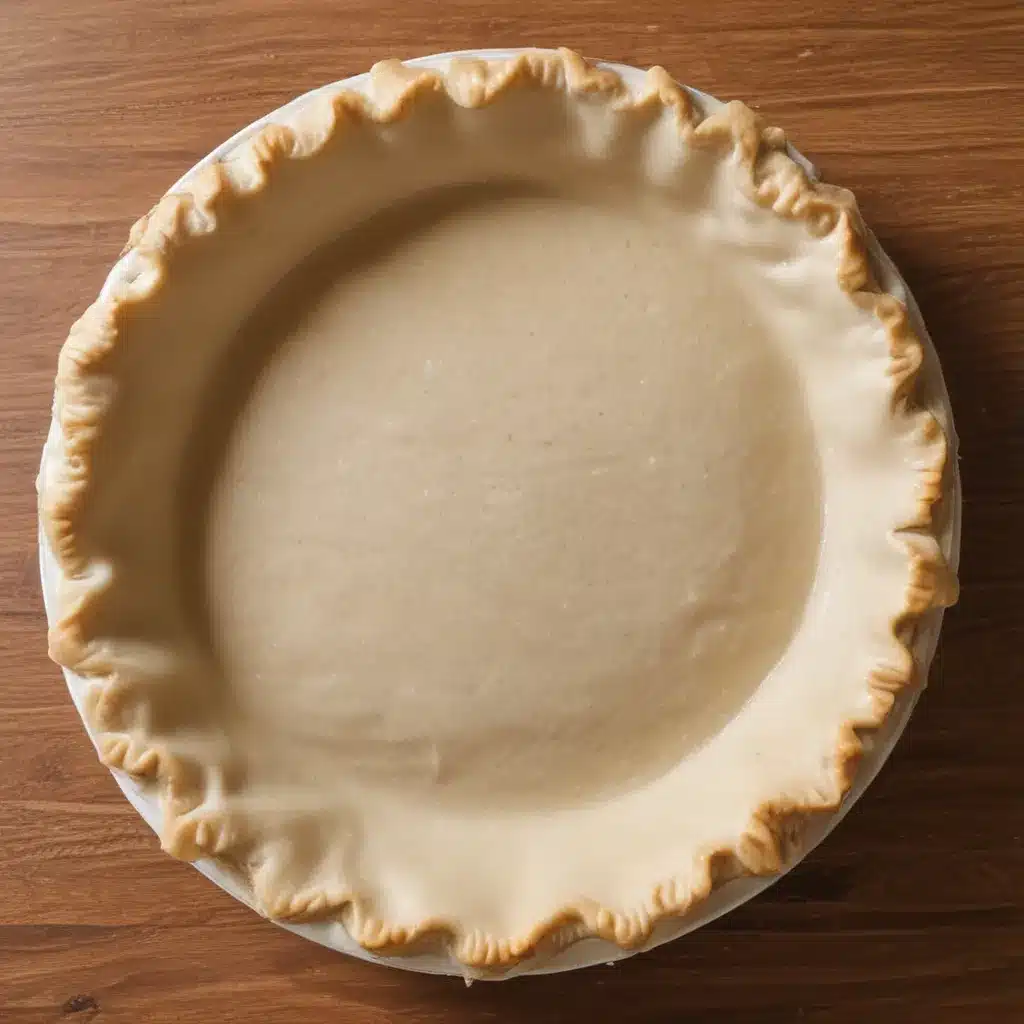
Alright, you’ve rolled out your masterpiece, and now it’s time to transfer it to your pie dish. Gently drape the dough over the pan, being careful not to stretch or tear it. Trim the excess, leaving about an inch of overhang, and then it’s time to get creative with the crimping.
There are a million ways to crimp a pie crust, from the classic fork-tine pattern to more intricate designs. But the key is to do it with confidence and a light touch. Remember, this is your pie, so make it your own!
If your recipe calls for a pre-baked crust, don’t forget the all-important blind baking step. This involves lining the unbaked crust with parchment paper and filling it with pie weights or dried beans. Bake it for 15-20 minutes, remove the weights, and then continue baking until the crust is lightly golden.
This extra step might seem like a hassle, but it’s the secret to preventing that dreaded soggy bottom. Trust me, your future self will thank you when you’ve got a perfectly cooked, crisp crust ready to hold your favorite fillings.
Pie Crust Perfection: The Reward for Your Efforts
Well, there you have it – the keys to achieving homemade pie crust perfection. From the essential ingredients to the chilling and rolling techniques, I’ve shared everything you need to create a crust that will have your friends and family begging for seconds.
Remember, baking is an art, and pie crust is the canvas. So embrace the process, have fun with it, and don’t be afraid to get a little flour on your nose. After all, the true reward is in that first bite of a perfectly flaky, buttery pie crust. It’s a moment of pure bliss that will make all your hard work worth it.
Happy baking, my fellow pie enthusiasts! And don’t forget to check out Home Cooking Rocks for more delicious recipe inspiration.


