The Homemade Bread Bowl Revolution
Alright, fellow home cooks, it’s time to take your soup game to the next level! Today, we’re diving headfirst into the wonderful world of homemade bread bowls. Forget those bland, store-bought options – these DIY creations are about to change the way you enjoy your favorite hearty soups forever.
Home Cooking Rocks has the scoop on crafting these edible masterpieces from scratch. Whether you’re a seasoned bread baker or a complete novice, I’m here to walk you through the process step-by-step. By the time we’re done, you’ll be whipping up crusty, golden-brown bread bowls like a true artisan.
The Bread Bowl Basics
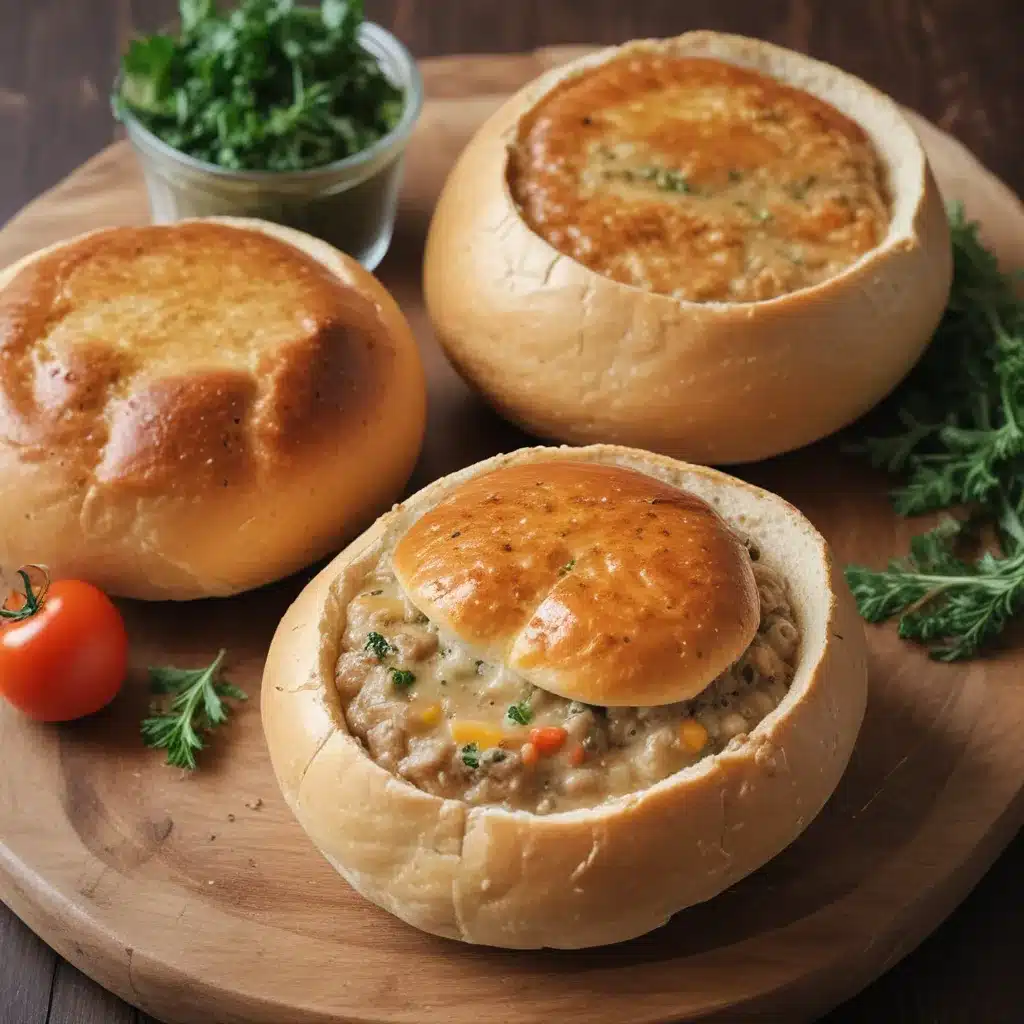
First things first – what exactly is a bread bowl, you ask? Well, my friends, it’s exactly what it sounds like: a round loaf of bread, scooped out to create a perfect little vessel for all sorts of delicious soups, stews, and dips. Think of it as the ultimate in edible presentation – a delicious and functional way to serve up your favorite comfort foods.
Now, I know the idea of baking bread from scratch might seem a bit daunting. But trust me, it’s way easier than you think! This recipe uses just four simple ingredients: yeast, water, flour, and salt. That’s it! No fancy equipment, no complicated techniques – just good old-fashioned elbow grease and a little bit of patience.
Kneading Out the Kinks
The key to making these bread bowls a success lies in the dough. And let me tell you, this dough is a real overachiever. After a quick proof to get the yeast all bubbly and activated, you’ll mix in the flour and salt. Then comes the fun part – the kneading.
Now, I know what you’re thinking: “Kneading? Isn’t that where things start to go wrong?” But not to worry, my fellow home cooks. I’ve got a little trick up my sleeve that’s going to make this process a breeze. Instead of spending 10 minutes slaving over the dough, we’re going to do a series of simple folds. This “lazy man’s kneading” method is the secret to developing that perfect, chewy texture without wearing out your arms.
Tastes Better From Scratch explains it perfectly: “The fold goes like this: top to bottom, bottom to top, right to left, left to right. This folding action will develop the glutens in the flour so you get that chewy, elastic texture that’s so satisfying in a good loaf of bread!”
Shaping, Scoring, and Baking
Alright, now that we’ve got that dough all nice and developed, it’s time to shape these babies into their signature bowl-like form. Divide the dough into six equal portions and use your hands to gently smooth each one into a tight, round ball. Place them on a baking sheet, let them rise for a bit, and then score the tops with an “X” to help them expand evenly in the oven.
Baking a Moment has a great video that shows the whole shaping process in action. Trust me, it’s way easier than it looks!
Once those beauties are all ready to go, it’s time to bake. Crank that oven up to a toasty 475°F, toss a pan of hot water in the bottom to create some steamy goodness, and let those bread bowls work their magic. In about 20-25 minutes, you’ll have a batch of golden-brown, crusty perfection, just waiting to be hollowed out and filled with your favorite hearty soup.
Endless Possibilities
Speaking of fillings, the fun doesn’t stop at the bread itself. These DIY bread bowls are a blank canvas, just waiting to be topped, stuffed, and devoured in all sorts of delicious ways. Sally’s Baking Addiction suggests everything from creamy chicken noodle to savory crab dip – the options are truly endless.
And the best part? These babies aren’t just for soup. You can also use them to serve up all kinds of dips, stews, chilis, and more. Heck, you could even turn them into individual bread puddings or breakfast casseroles. The world is your edible bread bowl, my friends!
The Homemade Advantage
Now, I know what you might be thinking: “But won’t these take forever to make?” And to that, I say – not at all! Sure, there’s a little bit of hands-on time involved, but the bulk of the process is just letting the dough do its thing. And trust me, the end result is so worth it.
Not only do homemade bread bowls taste infinitely better than their store-bought counterparts, but they also give you the satisfaction of having made something truly special from scratch. Plus, you can customize them to your heart’s content, experimenting with different flavor profiles and mix-ins to create your own signature creations.
Mel’s Kitchen Cafe sums it up perfectly: “Bread-making probably seems impossible, but think of it this way: it’s one of the most basic foods. Just simple ingredients mixed together, left alone to work some magic, shaped, and baked. That’s the process and it’s 100% something you can handle.”
The Moment of Truth
So, are you ready to take your soup game to new heights? Then let’s get baking! Gather up those simple ingredients, clear off a little counter space, and let’s dive headfirst into the wonderful world of homemade bread bowls. Trust me, your taste buds (and your guests) are going to thank you.
And remember, if you ever need a little extra inspiration, you can always pop over to Home Cooking Rocks for more delicious recipes and kitchen tips. Happy baking, my fellow culinary adventurers!


