Mastering the Art of Flaky, Buttery Homemade Pie Crust
As an interior designer and DIYer, I’ve always had a passion for creating beautiful spaces. But you know what they say – the way to someone’s heart is through their stomach. And when it comes to baking, there’s nothing quite like the homemade touch.
That’s why I’m on a mission to conquer the art of pie crust. It’s always seemed like this elusive, intimidating task that only the most seasoned bakers could master. But after years of trial and error, I can confidently say – if I can do it, so can you!
In this comprehensive guide, I’ll walk you through every step of making the perfect homemade pie crust, from start to finish. We’ll cover essential tips and tricks, common pitfalls to avoid, and even some creative crust designs to really make your pies shine. By the time we’re done, you’ll be whipping up flaky, buttery crusts like a true professional.
Understanding the Science of Pie Crust
Let’s start with the basics. At its core, a pie crust is a simple combination of flour, fat, and liquid. But the science behind getting that flaky, tender texture is really quite fascinating.
The key lies in how the fat (usually butter or shortening) interacts with the flour. When the fat is cut or mixed into the flour, it coats the flour particles and prevents them from fully hydrating. This limits gluten development, which is what gives bread its chewy texture.
Instead, the fat creates those signature flaky layers we love in a good pie crust. As the crust bakes, the fat melts and creates steam pockets, causing the dough to puff up and separate into flaky sheets.
The liquid component, usually ice water, also plays a crucial role. It helps bind the dough together, allowing you to roll it out without it falling apart. But too much water can lead to a tough, chewy crust – so it’s all about finding that perfect balance.
Gathering Your Ingredients
Before we dive in, let’s make sure you have everything you need to get started:
- All-purpose flour: Look for a high-quality, unbleached flour for best results.
- Unsalted butter: Cold, cubed butter is ideal. You can also use a combination of butter and shortening.
- Ice water: Having ice-cold water is key to keeping your dough flaky.
- Salt: A pinch of salt helps enhance the flavor.
- Sugar (optional): A teaspoon or two of sugar can add a lovely subtle sweetness.
With these simple ingredients, you’ll be well on your way to pie crust perfection. And the best part? This recipe makes enough dough for two 9-inch pie crusts, so you can have one ready to go in the freezer for next time.
Step-by-Step Guide to Making Homemade Pie Crust
Alright, let’s get started! I’ll walk you through the process step-by-step, with plenty of tips along the way.
Step 1: Prepare the Dough
Start by pulsing the flour, salt, and sugar (if using) in a food processor until well combined. Then, add in your cold, cubed butter and pulse until the mixture resembles coarse crumbs, with some pea-sized pieces of butter remaining.
The Perfect Loaf recommends keeping your butter and water super cold, as this will help the dough hold its shape better and contribute to a flakier crust.
Step 2: Add the Ice Water
With the processor running, slowly drizzle in the ice water, a tablespoon at a time, until the dough just begins to come together. You may need 4-6 tablespoons total, but be careful not to overwork the dough.
Once the dough starts to form large, cohesive clumps, stop the processor. You want to avoid kneading or over-mixing, as this can lead to a tough, dense crust.
Step 3: Shape and Chill the Dough
Turn the dough out onto a clean surface and gently gather it into a ball. Flatten the ball into a disc, about 1-2 inches thick, then wrap it tightly in plastic wrap. Refrigerate the dough for at least 1-2 hours, or up to 3 days.
Letting the dough rest in the fridge allows the gluten to relax, making it much easier to roll out without cracking or shrinking. Liz Lovery also suggests chilling the dough before rolling to help keep the fat nice and cold.
Step 4: Roll Out the Dough
When you’re ready to use your dough, generously flour your work surface and the top of the dough. Using a rolling pin, start rolling from the center outward, in a cross-hatch pattern.
Flip and rotate the dough as needed to prevent sticking and ensure even thickness. Aim for a 12-inch circle, about 1/8-inch thick. If you notice any cracks or tears, simply patch them with a bit of extra dough.
Step 5: Transfer and Fit the Dough
Carefully transfer the rolled-out dough to your pie plate. Gently press the dough into the corners and up the sides, being careful not to stretch it. Trim any excess dough, leaving about a 1/2-inch overhang.
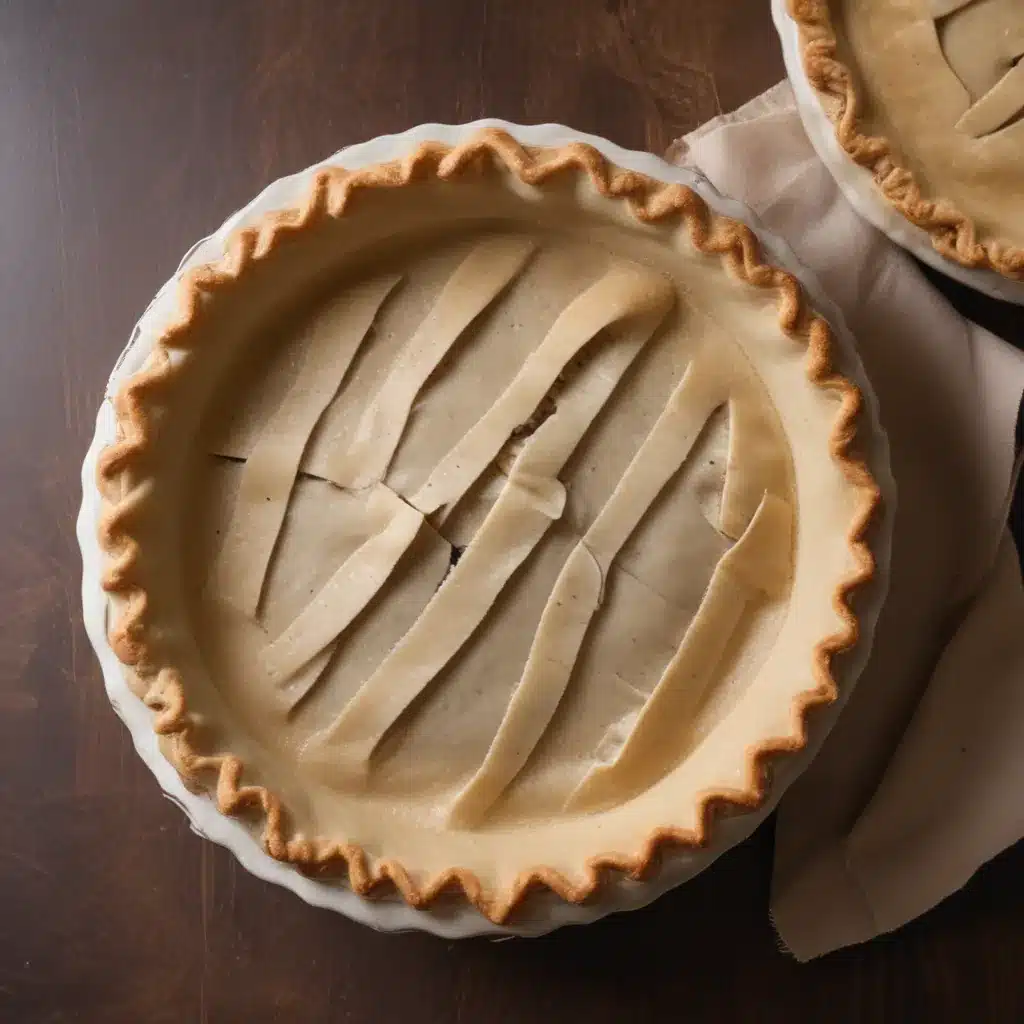
Now you can get creative with the edges! Try crimping with a fork, fluting with your fingers, or even cutting out shapes to decorate the rim. Just avoid stretching the dough, as that can lead to shrinkage during baking.
Step 6: Blind Bake (Optional)
If your pie recipe calls for a pre-baked crust, you’ll need to “blind bake” it first. This involves lining the dough with parchment paper or foil, then filling it with pie weights or dried beans to prevent the crust from puffing up.
Bake the weighted crust at 425°F for 15-20 minutes, until just starting to turn golden. Remove the weights and continue baking for another 3-5 minutes to fully cook the bottom.
Natural Comfort Kitchen has a great step-by-step guide on blind baking pie crust.
Troubleshooting Common Pie Crust Issues
No matter how careful you are, pie crust can be a temperamental beast. But don’t worry, I’ve been there too! Here are some common problems you might encounter and how to fix them:
Cracking or Shrinking Dough
If you notice cracks forming as you roll out the dough, try letting it rest at room temperature for 5-10 minutes before continuing. The warmth will help relax the gluten and make the dough more pliable.
You can also try patching any cracks with a scrap of dough and a dab of water to seal it. And be sure to avoid over-handling the dough, as that can cause it to shrink during baking.
Soggy Bottom Crust
This is often a result of not blind baking the crust properly. Make sure to prick the bottom with a fork and weigh it down with pie weights or dried beans before baking. This will help create a barrier against any wet fillings.
You can also try brushing the bottom of the crust with an egg wash or melted butter before adding the filling. This creates a seal that prevents moisture from seeping in.
Tough, Chewy Texture
Overworking the dough is the culprit here. Be gentle when mixing and rolling, and avoid adding too much water. Chilling the dough well before rolling is also key to maintaining that flaky, tender texture.
Putting Your Pie Crust to the Test
Now that you’ve mastered the art of homemade pie crust, it’s time to put your skills to the test! Here are a couple of my favorite pie recipes to get you started:
Classic Apple Pie
The Flavor Bender has an incredible apple pie recipe that showcases the beauty of a homemade crust. The key is using a variety of apples for the perfect balance of sweet and tart.
Berry Crumble Pie
For a real showstopper, try this Whole Grain Peach and Blueberry Sourdough Galette from The Perfect Loaf. The buttery, flaky crust is the perfect canvas for the juicy berries and crunchy crumble topping.
No matter which recipe you choose, I guarantee your homemade pie crust will be the star of the show. And who knows – you might just become the new baking superstar in your friend group.
Happy baking, my fellow crust connoisseurs! If you’re ever in the mood for more delicious, homemade inspiration, be sure to visit homecookingrocks.com. I’ll be there, whipping up all sorts of comfort food favorites.


