Chocolate Chip Cookies: A Confectionary Cornerstone
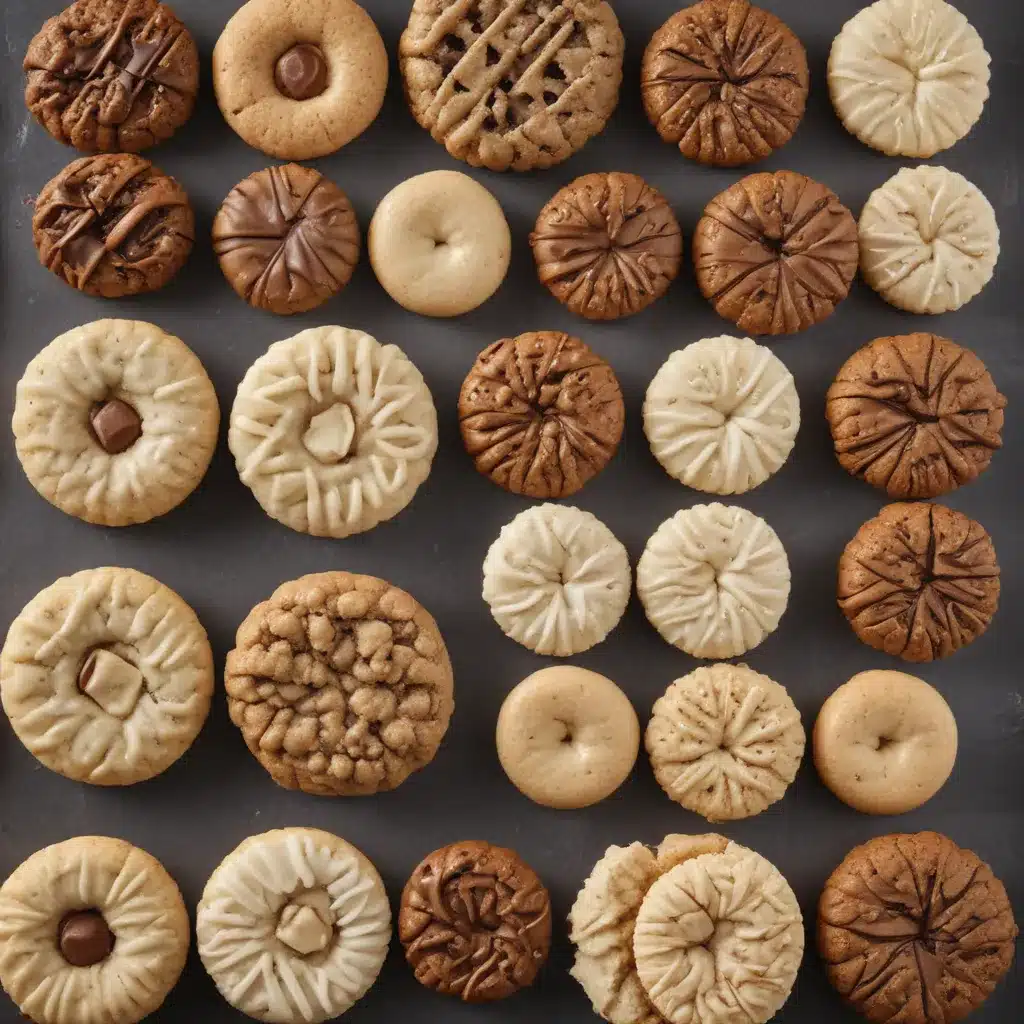
I don’t believe that one can have too many chocolate chip cookie recipes. They are perhaps the most sentimental dessert, and everyone has an opinion when it comes to the perfect chocolate chip cookie. Some prefer a thin, flat disc with crunchy edges and a little give in the center. Others may indulge in a cookie with a little more altitude and a fluffier, more cake-like crumb.
There’s a little bakery down the street from my house known around town for their dense, giant cookies and the equally large line for them that snakes around the building. To me, they feel like piles of chocolate chips bound together by large wads of cookie dough, ultra-gooey and barely holding together. I love them. My husband does not. But I get it, chocolate chip cookies can be a contentious topic. I’m not here to sway your opinions, only to submit a new variation to add to your cookie rotation.
I got this recipe in an email earlier this summer from Tara Jensen (whose book is beautifully written and has taught me so much about dough). I was working at the restaurant and my fellow pastry cooks and I spent weeks promising that we were going to test it out. I procrastinated all summer long, so when I returned home, these little cookies topped my to-do list. They did not disappoint.
Sourdough Chocolate Chip Cookies: A Tangy Twist
These sourdough chocolate chip cookies are soft, but with little crispy edges and the sourdough culture gives a slight tang, cutting through some of the richness. Using chopped chocolate instead of chocolate chips and implementing a little “tray banging” at the end of the bake, gives you little puddles of chocolate that you will just want to dive into. And please remember to salt your cookies!
I usually try to convert most recipes to cups and tablespoons in order to make things a little simpler for the home cook, however, I am a huge advocate for using metric measurements when baking, especially when it comes to using sourdough starters. Kitchen scales are relatively cheap and they are total game changers in the kitchen. Precision is not as imperative in cooking, but the science of baking really demands accuracy in order for things to turn out consistently.
For example, depending on your measuring cup, the humidity in your kitchen, and the way you scoop, a cup of flour will almost always have a different weight each time you measure. If you use a kitchen scale, though, you are able to do a much better job of controlling your ingredient portions and it will come out the same each time. The other reason I recommend using metric measurements is LESS DISHES. You don’t have to dirty a million different measuring cups and spoons and you can just weigh everything directly into your bowl. For me, that alone justifies the purchase of a kitchen scale.
This is the kitchen scale I am currently using and it does the trick just fine. *If you don’t yet have a sourdough starter and are ready to create your very own, check out my step-by-step guide here!
When I first shared this recipe, it was one that I received in an email newsletter. I made a couple, very small tweaks, liked the extra tang of the sourdough starter and thought I would share the recipe with you guys. They were a very good cookie, but not necessarily my perfect cookie. Fast forward a few months and this recipes is by far the most popular on the blog! You guys love adding sourdough to cookies, which is great, but since so many people were heading to the blog for these babies, I wanted to make sure the recipe was not just a good one, but an excellent one- one I was proud to be the most popular recipe on the site.
So after some more tinkering and adjusting, here are the new and improved Sourdough Chocolate Chip Cookies! They are a no longer a good cookie, but a really great cookie! P.S. I’ve gotten a lot of requests for the old recipe as people want to try both, side by side! I love this so much so you’ll find the original recipe below all the way at the bottom of this post. Try them both and decide which cookie fits your style, and maybe even make a few of your own tweaks to make these little guys perfect for you. Happy baking!
Mastering the Sourdough Chocolate Chip Cookie
I’ve received quite a few questions about this recipe, so if you have any questions, check the comments below first! I may have already answered your question.
The chilling time is pretty important for this cookie recipe. Chilling the cookie dough allows for proper hydration and the development of the sourdough flavor. That being said, if you are unable to chill the dough for the full 24 hours, give the dough at least 1 hour in the fridge to hydrate slightly before baking, but know that the sourdough flavor won’t be as pronounced.
Here’s the recipe for my perfected Sourdough Chocolate Chip Cookies:
Sourdough Chocolate Chip Cookies
Yield: 18-24 small cookies, or 10-12 large cookies
Recipe adapted from Tara Jensen
Ingredients:
– 250 g all purpose flour
– 2 sticks unsalted butter, softened
– 1 egg
– 50 g sourdough starter
– 100 g sugar
– 50 g brown sugar
– 1 T vanilla extract
– 1/2 tsp baking soda
– 1/2 tsp baking powder
– 3/4 tsp salt
– 400 g dark chocolate, chopped
Instructions:
1. In a medium bowl, whisk together flour, baking soda, baking powder, and salt. Set aside.
2. In the bowl of a mixer fitted with the paddle attachment, cream together butter, sugar, and brown sugar. Beat until creamy and light, then scrape down the sides of the bowl.
3. With the mixer on low speed, add in sourdough starter, egg, and vanilla. Mix until combined.
4. With the mixer on low speed, add flour mixture in two additions, scraping down the sides of the bowl and mixing until no flour streaks remain. Use a rubber spatula to fold in chocolate chips.
5. Transfer dough to a bowl, cover with plastic wrap and refrigerate for 24 hours.
6. When ready to bake, preheat the oven to 350 degrees. Scoop dough into balls and place on a baking sheet, leaving 2″ between each cookie.
7. Bake until tops are just set and edges are beginning to brown, 8-10 minutes for small cookies and 10-12 minutes for larger cookies. When removing from oven, bang the tray against the counter a couple of times to settle the cookies and create those much-desired chocolate puddles.
8. Let cookies cool on the tray for 5 minutes and then transfer to a cooling rack.
For those of you who have been following along for a while, you may remember the original Sourdough Chocolate Chip Cookie recipe I shared last year. Well, this is the new and improved version that I’m now sharing with all of you. I truly hope you enjoy it as much as we do!
Elevating the Classic Rice Krispie Treat
Now that we’ve tackled sourdough chocolate chip cookies, let’s move on to another classic cookie – the beloved Rice Krispie Treat. As the folks at Sugar Spun Run put it, “even more than a good classic recipe, I love a new twist on a classic.”
Their gourmet take on the lunchbox staple starts with using much more butter than the original recipe calls for (and they gently nudge you to use that rich, European-style butter). Real vanilla extract makes an appearance, as do lots of extra marshmallows. The end result is soft, chewy and full of flavor. Once you try these, there’s no going back.
Home Cooking Rocks is all about elevating the classics, so I’m excited to share this delightful variation with you. Let’s dive in!
Gourmet Rice Krispie Treats
The most likely culprit for tough, hard Rice Krispie Treats is the heat that you use to cook them. The folks at Sugar Spun Run recommend keeping your heat below medium-low at all times. If the marshmallows are exposed to too much (/too high) heat, they’ll become tough once they cool.
Have you ever made an indoor S’more in the microwave and ended up with a marshmallow that was hard enough to break your teeth? Well, that’s what will happen if your marshmallow is exposed to heat that’s too high, so keep the heat on low to avoid rock hard Rice Krispie Treats. Slow on low heat is the way to go for chewy results!
Another problem could be using too much pressure when spreading them into your prepared pan. If you pack everything in too tightly, they’ll end up denser and harder than they should be. Use a silicone spatula to gently spread everything evenly into your pan.
| Ingredient | Recommended |
|---|---|
| Butter | European-style or regular salted butter |
| Refrigeration | Do not refrigerate – store at room temperature |
As for the ingredients, regular salted butter will work in a pinch, but the folks at Sugar Spun Run highly recommend using that rich, European-style butter if you can find it. And whatever you do, don’t refrigerate the treats! Refrigerating can dry them out and make them too hard and brittle. Just store them in an airtight container at room temperature for several days.
Alright, are you ready to make some gourmet Rice Krispie Treats? Let’s get baking!
Elevating the Toll House Classic
No cookie roundup would be complete without the iconic Toll House Chocolate Chip Cookie. As the team at Hummingbird High explains, this is the famous Toll House recipe that we all know and love, but made even better with some easy baking tricks.
Sure, you can make the original Toll House recipe and end up with some pretty good cookies. But what if I told you that, with a little bit of extra work and patience, you could make the cookies even better? Intrigued yet?
The key upgrades include:
– Toasting the nuts to bring out deeper, more flavorful oils
– Melting the butter before creaming it with the sugars for a fudgy, dense center
– Chopping up premium chocolate bars instead of using chocolate chips
– Chilling the dough for 24 hours to develop richer, more complex flavors
Let’s dive into each of these enhancements and see how they can take your Toll House cookies to the next level.
Toasting for Flavor
The original Toll House recipe calls for 1 cup of chopped nuts. When testing this recipe, the team at Hummingbird High found that toasting the nuts before adding them to the dough makes a big difference. Toasting brings out the nuts’ flavorful oils, leading to deeper, more complex flavors in the final cookies.
Even if the nuts you have on hand are already “roasted”, the team recommends toasting them anyway. Those pre-roasted nuts tend to lose their freshness and flavor the longer they sit. So a quick trip through the oven will revive that nutty goodness.
Melting for Fudgy Texture
Another key change is melting the butter before creaming it with the sugars. The original recipe has you cream the butter and sugars together. However, the Hummingbird High team found that melting the butter first creates a wonderfully fudgy cookie with dense, slightly doughy centers.
This simple swap saves you the time of waiting for the butter to come to room temperature. Just melt it, mix it in, and you’re good to go.
Chopping for Puddles of Chocolate
Most chocolate chip cookie recipes call for, well, chocolate chips. But the Hummingbird High team has a bone to pick with chocolate chips. They argue that most chocolate chips are made with cheap chocolate pumped full of additives to help them hold their shape in the oven.
Instead, they recommend chopping up premium chocolate bars into rough 1/2- to 1-inch pieces. As the chocolate melts in the oven, it creates pockets and puddles of rich, decadent chocolate throughout each cookie. Once you try this upgrade, you’ll never go back to plain old chocolate chips.
Chilling for Deeper Flavors
In general, most cookie doughs benefit from a stint in the fridge or freezer before baking. The extra chill time allows the flour and sugar to absorb more flavors from the other ingredients, resulting in subtle notes of butterscotch, caramel and toffee.
For the Toll House cookies, the team at Hummingbird High recommends chilling the dough for a full 24 hours before baking. This may seem like a long time, but trust me, the extra effort is worth it.
The Ultimate Toll House Cookie
Ready to make the ultimate Toll House Chocolate Chip Cookies? Here’s the recipe with all the upgrades:
Elevated Toll House Chocolate Chip Cookies
Yield: About 24 cookies
Ingredients:
– 1 cup (120g) toasted walnuts, chopped
– 2 sticks (226g) unsalted butter, melted
– 3/4 cup (150g) brown sugar
– 1/4 cup (50g) granulated sugar
– 1 egg
– 2 tsp vanilla extract
– 2 1/4 cups (281g) all-purpose flour
– 1 tsp baking soda
– 1/2 tsp salt
– 12 oz (340g) chopped dark chocolate (62-73% cacao)
Instructions:
1. Toast the walnuts: Preheat oven to 350°F. Spread the walnuts in a single layer on a baking sheet. Bake for 8-10 minutes, stirring halfway, until fragrant and lightly browned. Let cool, then chop.
2. In a large bowl, whisk together the melted butter, brown sugar, and granulated sugar until combined.
3. Beat in the egg and vanilla until smooth.
4. In a separate bowl, whisk together the flour, baking soda, and salt.
5. Gradually mix the dry ingredients into the wet until just combined. Fold in the chopped chocolate and walnuts.
6. Cover the dough and refrigerate for 24 hours.
7. When ready to bake, preheat oven to 325°F and line baking sheets with parchment paper.
8. Scoop dough into 2-tablespoon sized balls, spacing them 2 inches apart on the prepared baking sheets.
9. Bake for 10-12 minutes, until the edges are set but the centers are still slightly underbaked.
10. Let cool on the baking sheets for 5 minutes before transferring to a wire rack.
There you have it – nine creative twists on classic cookies that are sure to delight. From sourdough chocolate chip to gourmet Rice Krispie Treats, these recipes elevate the familiar into the sublime. Happy baking, my friends!


